
A Beginner’s Guide to Building Your Own Gaming PC
Building your own gaming PC can be an exciting and rewarding experience. Not only do you get to customize your setup to meet your specific gaming needs, but you also gain a deeper understanding of how computers work. In this guide, we will walk you through the essential steps to build your own gaming PC, ensuring you have the knowledge and confidence to create a powerful machine that can handle the latest games.
**Understanding Your Needs**
Before diving into the components, it’s crucial to understand what you need from your gaming PC. Are you looking to play the latest AAA titles at high settings? Or are you more interested in casual gaming? Knowing your gaming style will help you choose the right components.
**Choosing the Right Components**
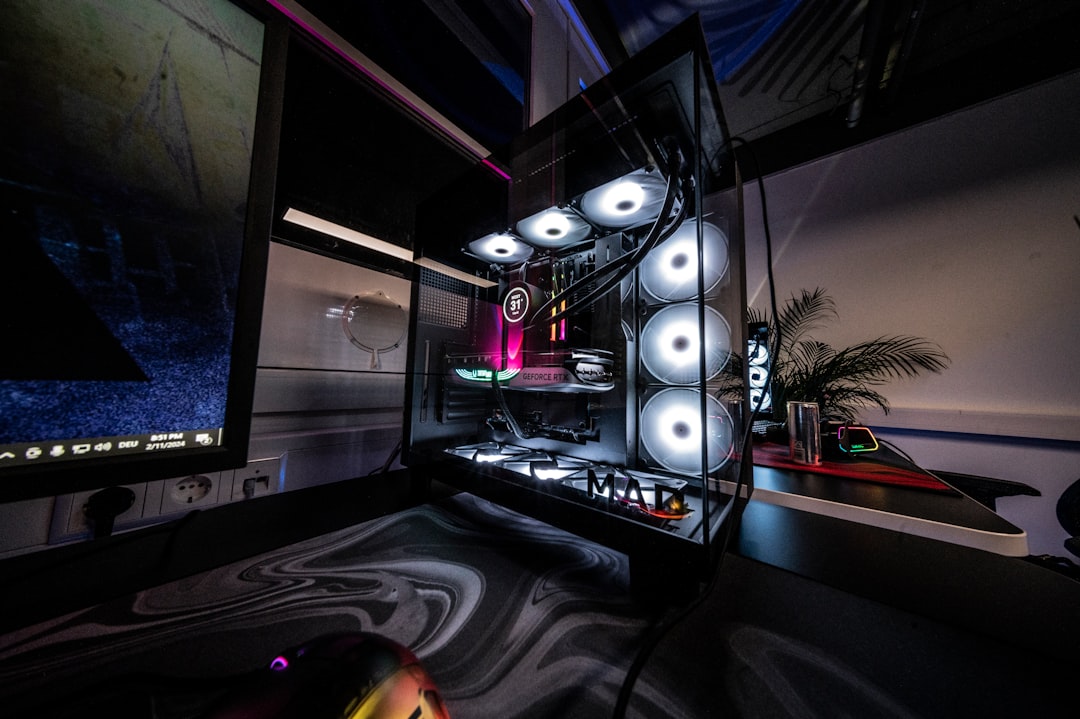
The main components of a gaming PC include the CPU, GPU, motherboard, RAM, storage, power supply, and case. Each part plays a vital role in the overall performance of your system:
1. **CPU (Central Processing Unit)**: The brain of your PC. Look for a processor that balances performance and price. Popular choices include AMD Ryzen and Intel Core series.
2. **GPU (Graphics Processing Unit)**: This is crucial for gaming performance. Invest in a good graphics card, as it will significantly impact your gaming experience. NVIDIA and AMD offer a range of options.
3. **Motherboard**: Ensure it is compatible with your CPU and has enough slots for future upgrades.
4. **RAM (Random Access Memory)**: 16GB is generally sufficient for gaming, but 32GB can future-proof your build.
5. **Storage**: Consider an SSD for faster load times and a larger HDD for additional storage.
6. **Power Supply**: Choose a reliable power supply with enough wattage to support your components.
7. **Case**: Select a case that fits your components and provides good airflow.
**Building Your PC**
Once you have all your components, it’s time to assemble your gaming PC. Here’s a step-by-step process:
1. **Prepare Your Workspace**: Ensure you have a clean, static-free environment to work in.
2. **Install the CPU**: Carefully place the CPU into the motherboard socket and secure it.
3. **Attach the Cooler**: Install the CPU cooler according to the manufacturer’s instructions.
4. **Insert RAM**: Slot the RAM sticks into the designated slots on the motherboard.
5. **Mount the Motherboard**: Secure the motherboard into the case using screws.
6. **Install the GPU**: Insert the graphics card into the PCIe slot and secure it.
7. **Connect Storage**: Attach your SSD and HDD to the motherboard and power supply.
8. **Power Supply**: Install the power supply and connect all necessary cables.
9. **Cable Management**: Organize cables for better airflow and aesthetics.
10. **Final Checks**: Ensure everything is connected properly before closing the case.
**First Boot and Installation**
After assembling your PC, it’s time for the first boot. Connect your monitor, keyboard, and mouse, and power on the system. Enter the BIOS to check if all components are recognized. If everything looks good, proceed to install your operating system and drivers.
**Checklist:** Choose your components, Assemble your PC, Install the operating system.
**Conclusion**
Building your own gaming PC may seem daunting at first, but with the right guidance and a clear understanding of your needs, it can be a fulfilling project. Not only will you save money compared to pre-built systems, but you’ll also have a machine tailored to your gaming preferences. Enjoy the process, and happy gaming!